Website load speed greatly impacts your website search rankings, bounce rates and overall user experience. Google’s tool called “Think with Google Test My Site” simply crawls your site with a slow 3G mobile browser and checks how fast the site loads and gives some generic improvement suggestions. We followed their guidelines and some other best practices to reduce load times. Here is what we discovered.
6 ways making your site to load faster with ThinkWithGoogle speed test
According to Google, we started of with 10s loading time and a 29% estimated visitor loss when we first ran the test! Not so sure about the estimated loss, but 10s is a long period of time for the site to load - let me tell you that. It definitely needed some optimization, so here’s what we did.
First, we made sure all items listed on Google’s PageSpeed Insights were addressed:
#1 Optimize images
Let’s start with the easiest – Google suggests to optimize the images. The easiest way to do it is by using free online tools, including Compressor.io, TinyPNG, and ImageOptim.
It’s also very important to resize the images to the dimensions used on the website. For example, if you are using 200x200px images on your pages, the images should be sized on your server this way. There are tons of free online tools to resize the images, like the following: ResizeImage. When you run the PageSpeed Insights tool, it optimizes your images and allows you to download them. However, optimizing them with the first tools described brings better results.
Lazy loading images
If your web page is very image heavy, consider "lazyloading" the images. Lazyload means that only those images that are in a viewport will be loaded. So, when the page loads, your browser only downloads the current images on the page, and continues to load more as the user scrolls down the page.
It helps to save bandwidth and reduce page loading time which allows for a quicker above-the-fold content render.
However, it has a downfall as you scroll to the next image. The image usually needs time to be downloaded and rendered to the browser, so for a couple of milliseconds or seconds (depends on internet connection speed) the block which should contain image is seen as blank or broken.

To avoid that, we use a loader animation and hide it with a nice fade transition when the image is ready to be seen.
We use this plugin for lazy loading.
#2 Minify HTML, CSS and JS
The next step is to minify HTML, CSS and JS files. This can be done using Gulp while the site is still in development mode, or you can recompile it. Alternatively, you can download optimized CSS, HTML and JS files for Google PageSpeed Insights tool. If you are using one of most popular content management systems, you can use a plugin:
#3 Leverage Browser Caching
The third step is a bit more challenging. It’s called “Leverage Browser Caching,” and it has more than one way to be dealt with.
If you don’t want to spend extra money on a hosting upgrade, one of the most cost-effective ways to leverage browser caching is to add a few lines to your .htaccess file (we are assuming you are on Linux server running Apache)
# Setting expire dates for cache <ifModule mod_expires.c> ExpiresActive On ExpiresDefault "access plus 1 seconds" ExpiresByType image/x-icon "access plus 2592000 seconds" ExpiresByType image/jpeg "access plus 2592000 seconds" ExpiresByType image/png "access plus 2592000 seconds" ExpiresByType image/gif "access plus 2592000 seconds" ExpiresByType image/svg "access plus 2592000 seconds" ExpiresByType application/x-shockwave-flash "access plus 2592000 seconds" ExpiresByType text/css "access plus 2592000 seconds" ExpiresByType text/javascript "access plus 216000 seconds" ExpiresByType application/javascript "access plus 216000 seconds" ExpiresByType application/x-javascript "access plus 216000 seconds" ExpiresByType text/html "access plus 600 seconds" ExpiresByType application/xhtml+xml "access plus 600 seconds" ExpiresByType application/x-font-ttf "access plus 1 year" ExpiresByType application/x-font-opentype "access plus 1 year" ExpiresByType application/x-font-woff "access plus 1 year" </ifModule> <IfModule mod_headers.c> <filesmatch "\.(ico|flv|jpg|jpeg|png|gif|css|swf|svg)$"> Header set Cache-Control "max-age=2678400, public" </filesmatch> <filesmatch "\.(html|htm)$"> Header set Cache-Control "max-age=7200, private, must-revalidate" </filesmatch> <filesmatch "\.(pdf)$"> Header set Cache-Control "max-age=86400, public" </filesmatch> <filesmatch "\.(js)$"> Header set Cache-Control "max-age=2678400, private" </filesmatch> <filesmatch "\.(woff)$"> Header set Cache-Control "max-age=2678400, private" </filesmatch> </IfModule>- If you are using a server with cPanel, it’s a great way to add nginx plugin, because this gives some serious boost while loading static content.
- Finally, you can upgrade your hosting with CDN (content delivery network). It’s a great way to improve your website performance but it can be quite expensive in some cases. Here is a great explanation of how it works:
Leverage browser caching for Google Analytics
In some rare cases, these optimizations won’t solve all your problems. For example, third-party scripts, like Google Analytics, can still be listed as an issue of Google's Leverage browser caching. To solve this issue, use the following code snippet instead of a regular one that Google Analytics provides:
<script>
  window.ga=window.ga||function(){(ga.q=ga.q||[]).push(arguments)};ga.l=+new Date;
  ga("create", "REPLACE THIS WITH YOUR CODE", "auto");
  ga("send", "pageview");
</script>
<script async src="https://www.google-analytics.com/analytics.js"></script>
#4 Eliminate render-block resources
I hope you're still enjoying this process. We’re almost finished!
Eliminating render-block resources above the fold can be tricky. If you are using Joomla or WordPress, the plugins mentioned above might do the job, but otherwise you might need to move all JS files from the document head to the end of your document body, then make all unused CSS resources load with a delay, and only keep those necessary to show the first fold content. An alternative solution is to add a loader screen instead of delaying CSS resources. You can find some cool free lightweight loaders here.
#5 Enable Gzip compression
The fifth step is to enable compression.
To enable gzip compression simply add these lines to your .htaccess file:
#Gzip
<IfModule mod_deflate.c>
  # Compress HTML, CSS, JavaScript, Text, XML and fonts
  AddOutputFilterByType DEFLATE application/javascript
  AddOutputFilterByType DEFLATE application/rss+xml
  AddOutputFilterByType DEFLATE application/vnd.ms-fontobject
  AddOutputFilterByType DEFLATE application/x-font
  AddOutputFilterByType DEFLATE application/x-font-opentype
  AddOutputFilterByType DEFLATE application/x-font-otf
  AddOutputFilterByType DEFLATE application/x-font-truetype
  AddOutputFilterByType DEFLATE application/x-font-ttf
  AddOutputFilterByType DEFLATE application/x-javascript
  AddOutputFilterByType DEFLATE application/xhtml+xml
  AddOutputFilterByType DEFLATE application/xml
  AddOutputFilterByType DEFLATE font/opentype
  AddOutputFilterByType DEFLATE font/otf
  AddOutputFilterByType DEFLATE font/ttf
  AddOutputFilterByType DEFLATE font/woff
  AddOutputFilterByType DEFLATE image/svg+xml
  AddOutputFilterByType DEFLATE image/x-icon
  AddOutputFilterByType DEFLATE text/css
  AddOutputFilterByType DEFLATE text/html
  AddOutputFilterByType DEFLATE text/javascript
  AddOutputFilterByType DEFLATE text/plain
  AddOutputFilterByType DEFLATE text/xml

  # Remove browser bugs (only needed for really old browsers)
  BrowserMatch ^Mozilla/4 gzip-only-text/html
  BrowserMatch ^Mozilla/4\.0[678] no-gzip
  BrowserMatch \bMSIE !no-gzip !gzip-only-text/html
  Header append Vary User-Agent
</IfModule>
# End Gzip

# If mod_deflate doesn’t work on your server you can use mod_gzip
<IfModule mod_gzip.c>
  mod_gzip_on Yes
  mod_gzip_dechunk Yes
  mod_gzip_item_include file .(html?|txt|css|js|php|pl)$
  mod_gzip_item_include handler ^cgi-script$
  mod_gzip_item_include mime ^text/.*
  mod_gzip_item_include mime ^application/x-javascript.*
  mod_gzip_item_exclude mime ^image/.*
  mod_gzip_item_exclude rspheader ^Content-Encoding:.*gzip.*
</IfModule>
#6 Enable HTTP Keep-Alive (persistent connection)
Enabling HTTP Keep-Alive or persistent connection allows a single open connection for multiple file requests to your server, which helps to speed up the loading time of your website. Also it saves a lot of bandwidth.
You can enable HTTP Keep-Alive by copying and pasting the following code into your .htaccess file:
#Gzip
<IfModule mod_headers.c>
  Header set Connection keep-alive
</IfModule>
Read more about how to enable HTTP Keep-Alive on other applications here.
Server and maintenance
We haven’t upgraded the server during this optimization process, but in many instances, that should be the first step.
The Website hosting server is one of the major factors influencing your website loading times. If your website is hosted on a shared hosting (most cheap hosting packages are) - upgrading it to a VPS server would be highly recommended.
High trafficked international websites can greatly benefit from CDN (Content Delivery Network). CDN is based on multiple servers located across the world delivering content to users based on their geolocation. The static files of your website can also be stored in a CDN server to deliver them more quickly and reduce load of your server. The downside, of course, is it’s expensive.
Keeping the website up to date and removing unnecessary plugins also helps maintain performance over time.
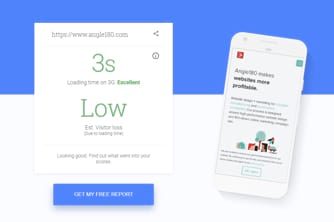
Conclusion
Our 3-second load time is an optimal solution that meets Google’s top performing website criteria and also maintains the balance between user experience, server cost and security. More than that, using Google PageSpeed Insights tools, the site gets 88/92 points, which is a great result for a CMS driven website.
It was a good experiment that we repeated with our clients' websites, as website speed optimization is an important part of our website maintenance process.


